
3 Nature Art Projects for Kids

Exploring nature is a great way to get outside and create bonding experiences with friends and family. In this blog, we will learn to experience nature by utilizing the senses to create art.
Activity 1: Rock Painting
For this activity, we will use our sense of touch and sight. Materials needed are paint, paint brushes and rocks.
- This activity can take place from a picnic table to the floor.
- We suggest using newspaper underneath to catch paint spills.
- Once you have found several rocks to paint on, lay them out on your work space.
- Use the paint brushes and paint to begin painting.
Activity 2: Drawing Nature
This activity involves using the sense of sight, smell and sound to observe the world around us. Materials need to fill your backpack are craft paper, markers, crayons and other items that you might need to be capture nature.
- Find a comfortable spot to sit at the park and start drawing what comes to your attention. What are the things that inspire you from the nature around you?
- After the drawing is done, discuss why the scene was picked.
Activity 3: Leaf Painting
In this final activity, we will use the sense of touch to experience textures and sight to explore color. Materials needed for this project are paint, paint brushes, white paper and leaves.
- Go to your backyard or the park and find leaves that you think are unique.
- Choose the leaf you will paint with the color of your choice. You can even be more creative in mixing the colors together.
- Once you have painted the leaf, press the painted side onto the white paper. You will notice a better visual of how the leaf is formed.
 Crystal Maciel, CFA Intern
Crystal is interning with the Children’s Foundation of America this spring as she completes her bachelor’s degree in sociology at Cal State San Bernardino. She has earned an associate’s degree in child development at Chaffey College and plans to continue her education with a mater’s degree in social work. Crystal’s career goals are to advocate for children, support families in need of assistance and to help children cope with problems in everyday life. Crystal’s work experience includes care of children toddler to 5 years of age and has worked for three years with children and adults with disabilities. In Crystal’s free time, she enjoys going to art galleries, sewing, gardening and painting.

Random Act of Kindness: “Valentine’s Day” Craft

Celebrating someone you love–a friend, neighbor, coworker or stranger–by showing how special they are to you can make their entire day. We’ve come up with a great way to show love with a random act of kindness. Here is a crafty activity to make as a gift:
- First cut out 20 or more heart shapes on card stock paper or any craft paper using colors like red and pink.
- Decorate one side using crayons, markers, glitter, pictures or any other unique ideas you might have.
- On the blank side, write a compliment, quote or appreciation for them.
- Give to a special someone or give to a stranger as an act of random kindness!
Crystal Maciel, CFA Intern
Crystal is interning with the Children’s Foundation of America this spring as she completes her bachelor’s degree in sociology at Cal State San Bernardino. She has earned an associate’s degree in child development at Chaffey College and plans to continue her education with a mater’s degree in social work. Crystal’s career goals are to advocate for children, support families in need of assistance and to help children cope with problems in everyday life. Crystal’s work experience includes care of children toddler to 5 years of age and has worked for three years with children and adults with disabilities. In Crystal’s free time, she enjoys going to art galleries, sewing, gardening and painting.

National Friendship Day: Allie and Drew’s Friendship Quilt

August 6 is National Friendship Day. National Friendship Day gives you the perfect opportunity to discuss the meaning of friendship with the children in your life. We spent the afternoon with Allie and Drew to create a visual representation of the different activities friends can do together.
What You Will Need:
- Scissors
- Hole Punch
- Glue Sticks
- Yarn
- Crayons or Colored Pencils
- 9-12 Square Sheets of Colored Paper
- 9-12 Slightly Smaller Sheets of White Paper
- 1 8.5 X 11 Sheet of While Paper
Your Work Space:
The best work space for this project would be in a communal area of the home where there is a flat surface to work on. What’s great about creating a friendship quilt is that your children have full creative freedom! Each square will become it’s own masterpiece!

Step 1:
Brainstorm! Ask your children to think of a few different things they can do with a good friend. Next, equally divide the white squares to your children and let them draw a picture to represent each activity.

Step 2:
Once all of the white squares have a completed picture, glue the white square onto a colorful square sheet of colored paper. Be sure the white square is glued in the center of the colored paper sheet so that it leaves a visible border.

Step 3:
Using the white 8.5 X 11 sheet of white paper, create a name for your Friendship Quilt and make a colorful sign for it. This sign will be a collaborative art project between the children creating the quilt squares.

Step 4:
Lay out all squares into a grid design. This is an opportunity for everyone creating the quilt to agree upon a composition. Next, punch holes approximately a half inch from the edge of the quilt squares on each side that a stitch will be required. Using yarn, stitch the squares together using a simple knot or bow for each stitch. Lastly, attach the sign to the top of the quilt using three stitches.
Finishing Touches
Punch two holes at the top of the paper and tie a long piece of yarn through each hole and hang your creation!
 Have a Discussion
The best part about creating a friendship quilt is the discussion you have following the craft explaining what each quilt square represents. Here is what Allie and Drew came up with when asked, “What are some things you like to do with your friends?” (from top left to bottom right):
Allie: “Eat ice cream.”
Drew: “Go to a baseball game.”
Drew: “Go shopping. This is a cowboy boot, a high heel, and a flip flop.”
Allie: “Have fun at school together.”
Drew: “Go to the zoo. This is a tiger!”
Allie: “Playing at a friend’s house.”
Allie: “Watch Minions at the movies.”
Drew: “Walk through a maze together.”
Allie: “You can go bowling.”
Allie: “Go to the park and play on the slide.”
Drew: “You can play outside together. This is me and my papa!”
Drew: “You can go to church together! This is the church and the different doors.”
 Rebecca Ustrell, Community Outreach Coordinator
Becky acts as liaison for Children’s Foundation of America. On any given day she could be meeting with potential donors, coordinating a fundraising event, recruiting volunteers and forming partnerships with other nonprofits that can benefit from the help of our Foundation. Becky is currently studying sociology as well as fine art and helps organize the Claremont Art Walk. You will most likely find Becky working on freelance illustrations, playing the cello, mingling at a chamber of commerce event or volunteering in the community.
800-543-7730 | rustrell@trinityys.org
Simple Blanket With Fringe Craft

Nothing says comfort like a cozy blanket made especially for you! Making this no-sew blanket is as easy as 1-2-3. Combine your favorite colors to create unique blankets for your children to snuggle up with.
What You Will Need:
- Scissors
- Crochet Hook
- Clothes Pins
- Fleece Fabric
- Assorted Yarn
- Ruler

Your Work Space:
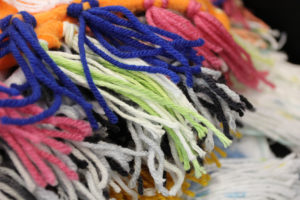
Be sure and choose a comfortable spot to create your blanket. Since there is no mess you can easily spread out your craft supplies on the coffee table or on the couch. For our blanket, we choose a combination of bright and soft colors for the fringe. Keep in mind that you can also use chunky yarn for a fluffier effect. Make it your own!
Step 1:
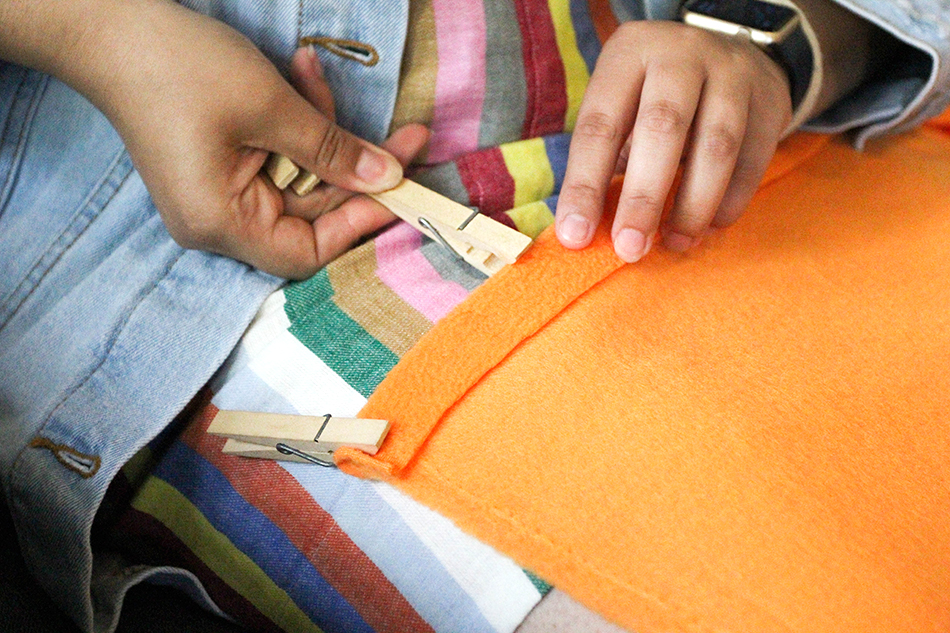
Start at the corner of your fleece blanket and fold along the edge about 1 inch. Hold the fold in place using clothes pins. Do this along the entire edge of the blanket.


Step 2:
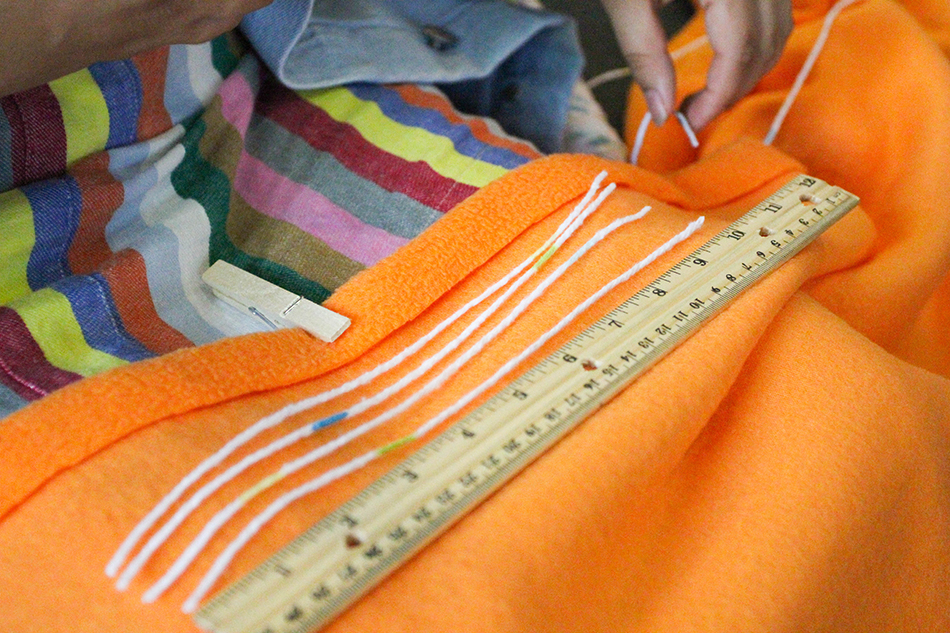
Make small cuts along the fold of the blanket about 1/2 inch long and 1-2 inches apart.
Step 3:
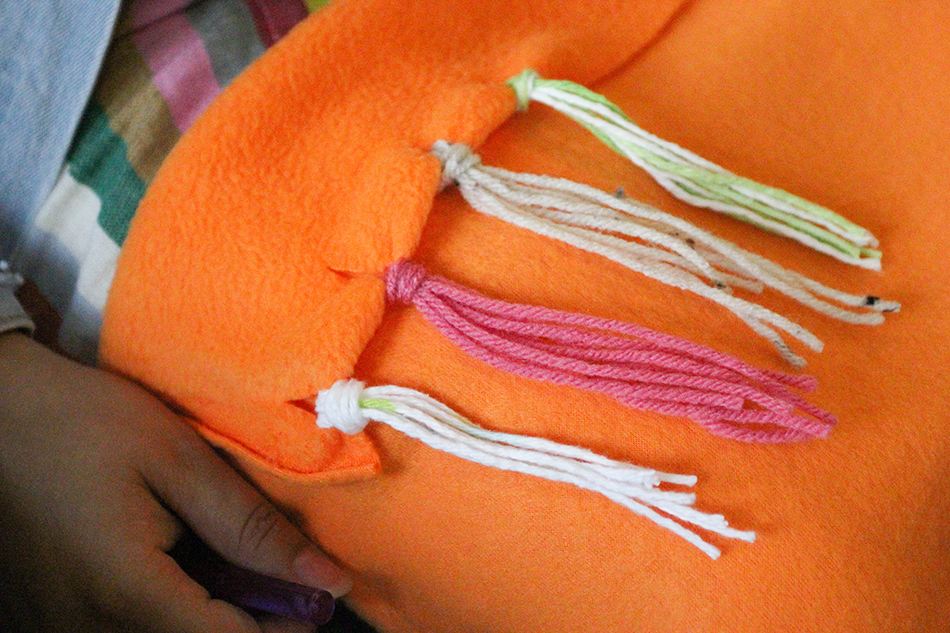
Choose your favorite yarn and cut 10-inch strips. This will become the fringe that will be attached along the edge of the blanket. You will need to cut approximately 4 strips per hole.

Step 4:
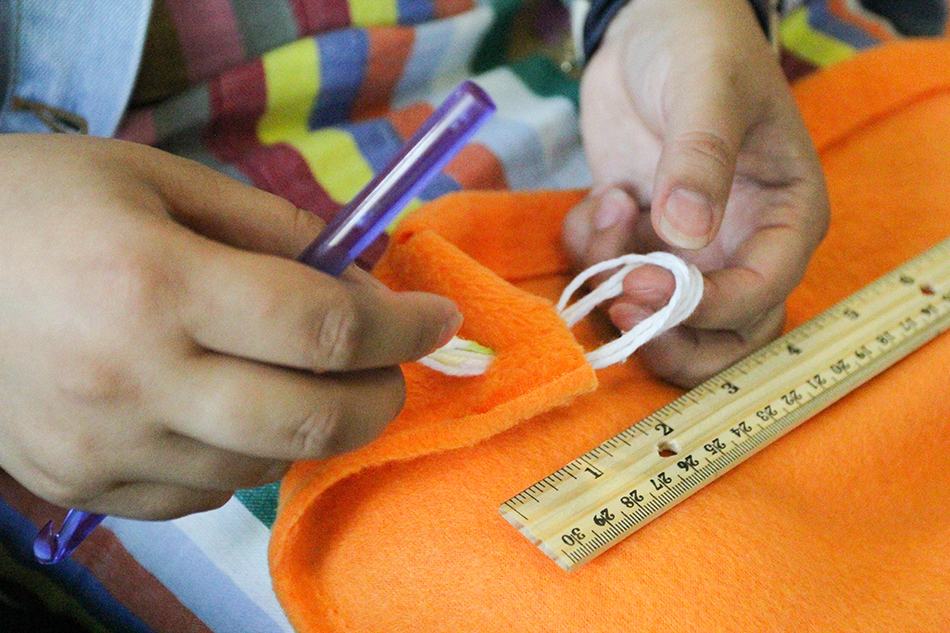
Gather all four strips of yarn and fold them in half. Using a crochet hook, pull the looped end through the first hole. Pull the ends of the yarn through the loop and tighten into a knot. Repeat this step along the entire edge of the blanket.
Mix It Up
Remember to have fun with your blanket. Using an assortment of colors can add a cheerful characteristic. The important thing is that you make it your own.

 Rebecca Ustrell, Community Outreach Coordinator
Becky acts as liaison for Children’s Foundation of America. On any given day she could be meeting with potential donors, coordinating a fundraising event, recruiting volunteers and forming partnerships with other nonprofits that can benefit from the help of our Foundation. Becky is currently studying sociology as well as fine art and helps organize the Claremont Art Walk. You will most likely find Becky working on freelance illustrations, playing the cello, mingling at a chamber of commerce event or volunteering in the community.
800-543-7730 | rustrell@trinityys.org

Pin the Tail on the Bunny Craft

Easter is just a hop, skip, and a jump away, and we’ve got just the craft to keep your little ones entertained! This adorable project will provide a tactile activity that will not only keep your children busy, but will assist with motor and brain functions. Enjoy this project during springtime for years to come. Note: This project involves sharp objects and is intended for adults to create for their children to enjoy.
What You Will Need:
- 1 Large Green Felt Sheet
- 1 Large White Felt Sheet
- 1 Printed Rabbit Template
- Assorted Felt Swatches
- 1 Marker
- Assorted Embroidery Thread
- 1 Embroidery Needle
- 1 Pin Cushion (for safe needle handling)
- Fabric Pins
- Fabric Scissors
- 5 Adhesive Velcro Squares
Your Work Space:
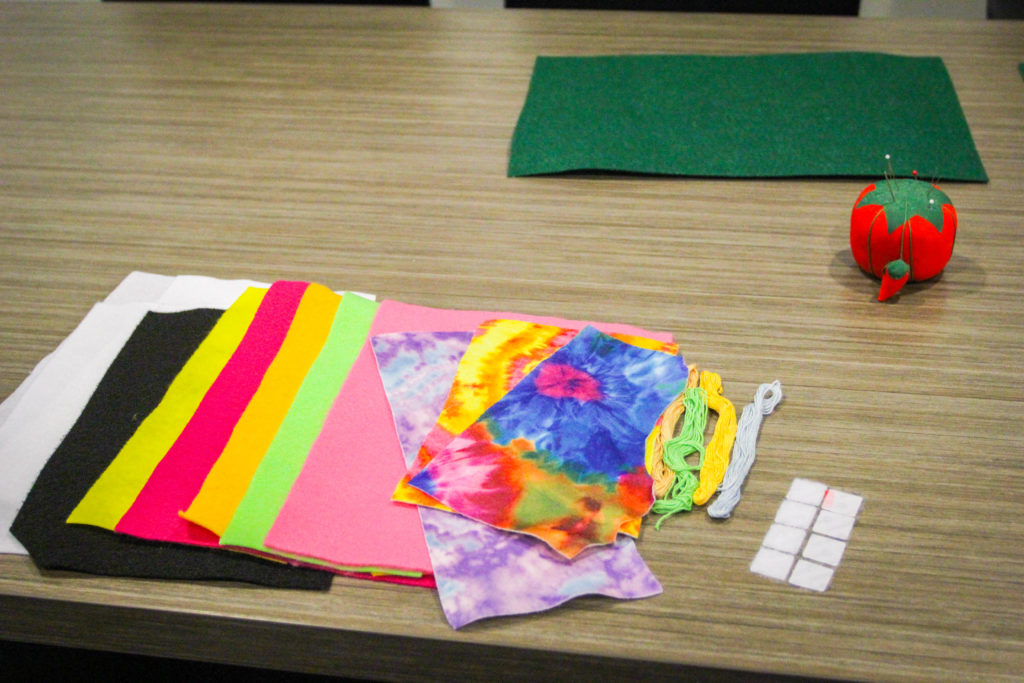
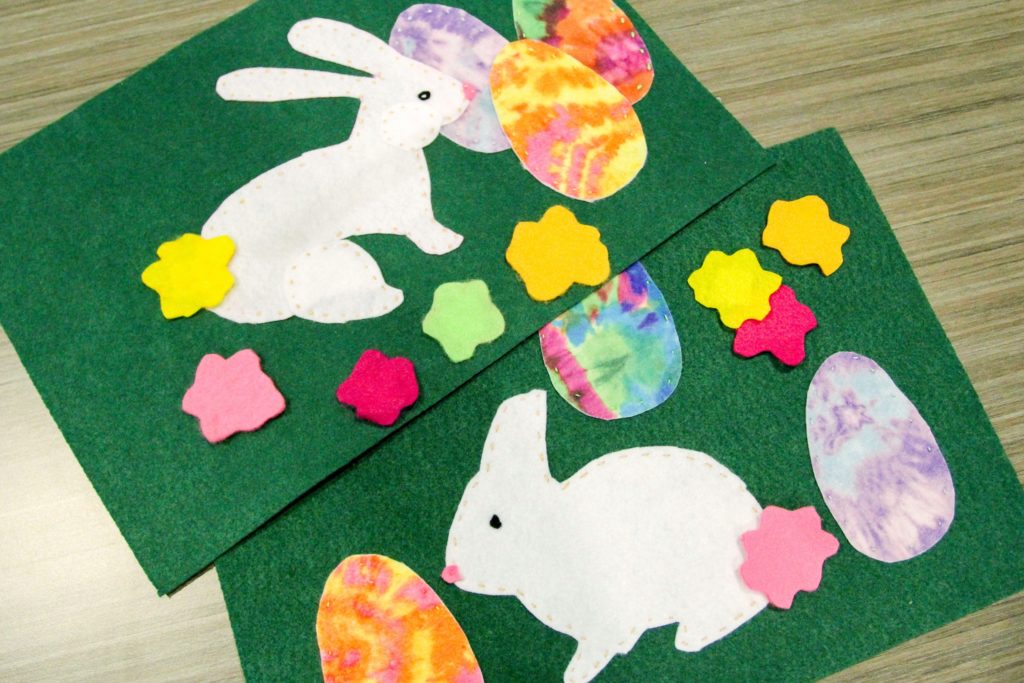
Make sure to have ample space to spread out your craft supplies. For our Pin the Tail on the Bunny creation, we chose a green felt background to give the appearance of grass, but you can choose whichever colors are your favorite! Get creative, find fun patterns to use for your Easter eggs and cotton tails.
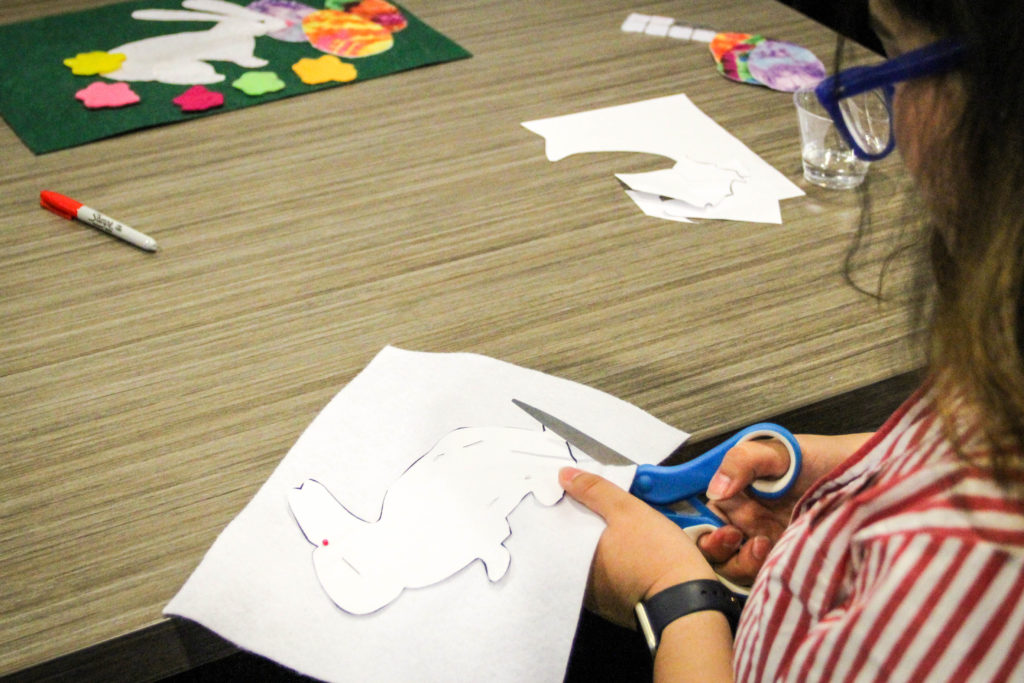
Step 1:
On an 8.5 X 11 sheet of paper, print out an outline of a bunny or draw one of your own creation! Cut along the line and set the bunny aside. Using fabric pins, secure the bunny pattern onto a single sheet of white felt. Using the pattern as a template, cut along the outline of the bunny to create your fluffy fella. Detach the pins from the paper bunny, and set the felt bunny to the side. Next, use patterned sheets of felt to create Easter eggs. Cut these shapes out and set them to the side to be used on your final springtime scene.
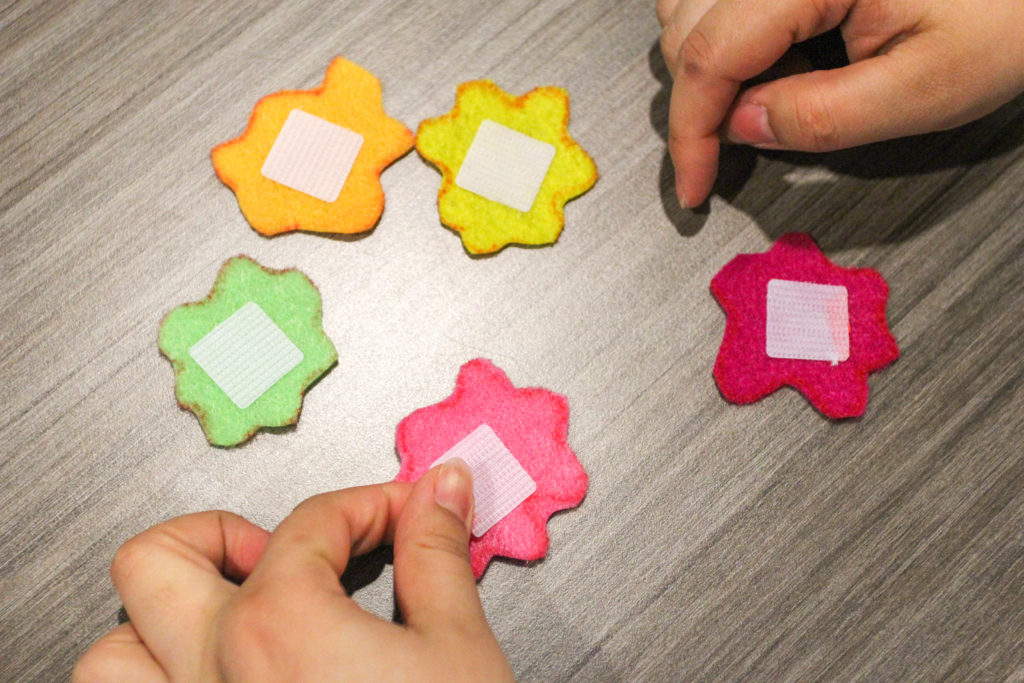
Step 2:
This is a step that your child can help with. Using a marker, have your child draw fluffy bunny tails onto multicolored sheets of felt. Carefully cut out each tail, following the outline. Now, let’s make outr bunny tails sticky! Remove the adhesive backing, and place a square of Velcro (the rough side of the Velcro, not the fluffy side) onto the backside of each tail. Place bunny tails to the side along with your bunny and egg shapes.

Step 3:
It’s time to create the scene. Have your kiddos arrange the bunny and eggs onto the green felt sheet. Next, pin the pieces onto the fabric to secure your scene in place. Finally, choose your favorite color embroider string and sew the pieces into place.

Step 4 (Optional):
Finish off your creation by adding fun details. We decided to go with a small pink nose and little eye for our bunny. These details can easily be made by cutting out small pieces of felt and sewing them into place with a single stitch. Another alternative is kids can use their creativity by customizing the details with markers. Have fun with your design! You can add as many or as little details as you wish.
It’s Time to Play!
Now for the fun part: blindfold the kiddos, hand them a bunny tail, give them a spin and send them in the direction of the bunny scene to pin the tail on the bunny!
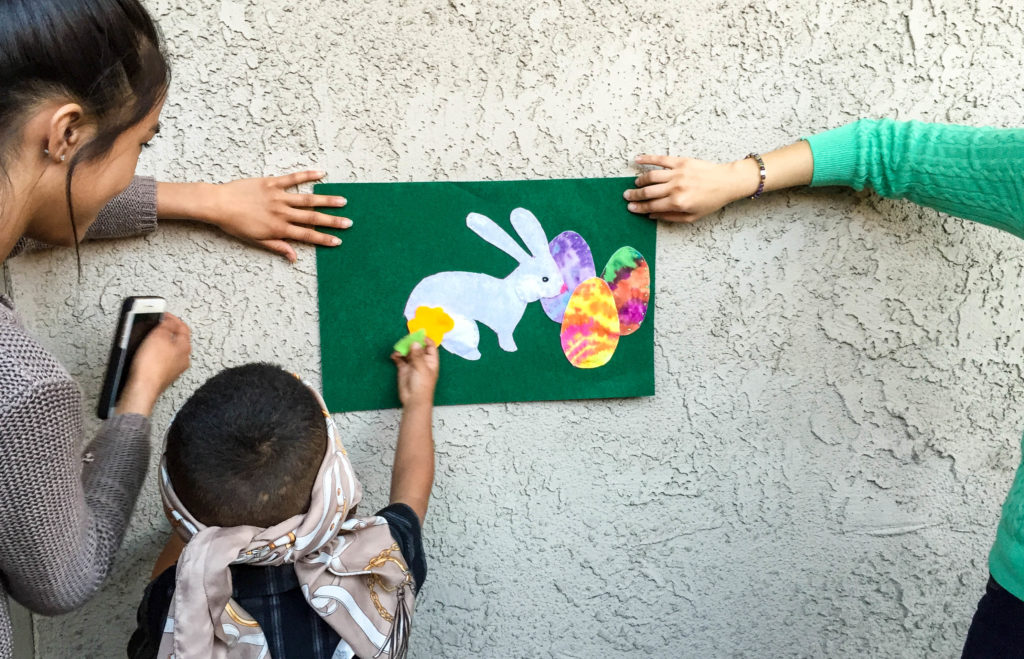
We brought this activity to Trinity Youth Services foster care office in West Covina and it was a huge hit! The kids took multiple turns, hopping back in line as often as they could and encouraged one another to get the bunny tail as close as possible. The children in Trinity’s care are truly a heart-warming inspiration!
Rebecca Ustrell, Community Outreach Coordinator
Becky acts as liaison for Children’s Foundation of America. On any given day she could be meeting with potential donors, coordinating a fundraising event, recruiting volunteers and forming partnerships with other nonprofits that can benefit from the help of our Foundation. Becky is currently studying sociology as well as fine art and helps organize the Claremont Art Walk. You will most likely find Becky working on freelance illustrations, playing the cello, mingling at a chamber of commerce event or volunteering in the community.
800-543-7730 | rustrell@trinityys.org

National “Pi” Day Paper Pie Craft
We’re celebrating National “Pi” Day with this adorable paper pie craft. Using only two different “ingredients,” you’ll find that this pie recipe is both simple and fun!
Ingredients & Tools:
- Assorted Construction Paper (Pie Crust, Filling, Toppings)
- Paper Plates (Pie Tins)
- Stapler
- Pen
- Scissors

Your Work Space:
Make sure to have ample space to spread out your craft supplies. For our paper pies we chose to include paper that would match the color of popular pie fillings and beige paper for the pie crust. Remember to make this craft your own! By using patterned paper or paint, you can add a dimension of flair to your finished product.
 Step 1:
Choose a pie tin (paper plate) and trace the circumference of the tin onto the pie crust (beige construction paper). Next, trace a line roughly 1/2 inch around the outside of the circle.
 Step 2:
Cut along the outer circle. Then fold the circle in half and cut out the center of the pie crust along the inner circle.

Your finished shape should look something like this.
Crumble up your pie crust ring. This will give the finished pie a more natural look!
 Step 3:
Choose your pie filling. We went with blueberry. Once you’ve picked your filling, crumble up the construction paper and arrange onto the pie tin.
 Step 4:
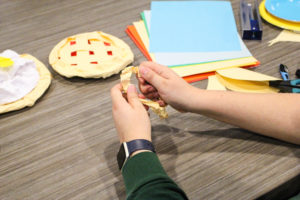
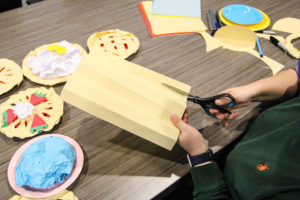
It’s time to prepare out lattice crust strips.
Take a sheet of pie crust and fold it “hot dog style” three times until you have seven guidelines. Cut along each line to make eight strips of pie crust.
 Step 5:
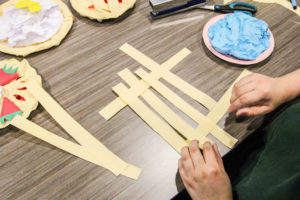
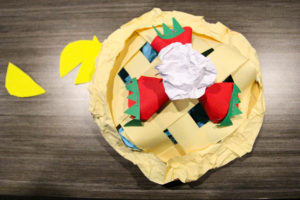
To assemble your lattice crust, place four strips vertically onto your table and weave each of the remaining four strips horizontally over and under each vertical strip.
 Step 6:
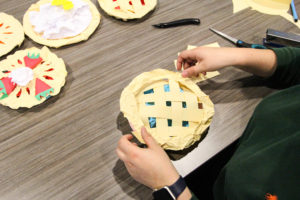
Place the lattice crust onto the top of your pie filling and secure each corner with a staple through the crust and onto the pie tin. Next, trim the pies of crust that are hanging off the edge of the pie tin.
 Step 7:
Place your pie crust ring over your lattice crust and secure with staples along the edges.
 Step 8:
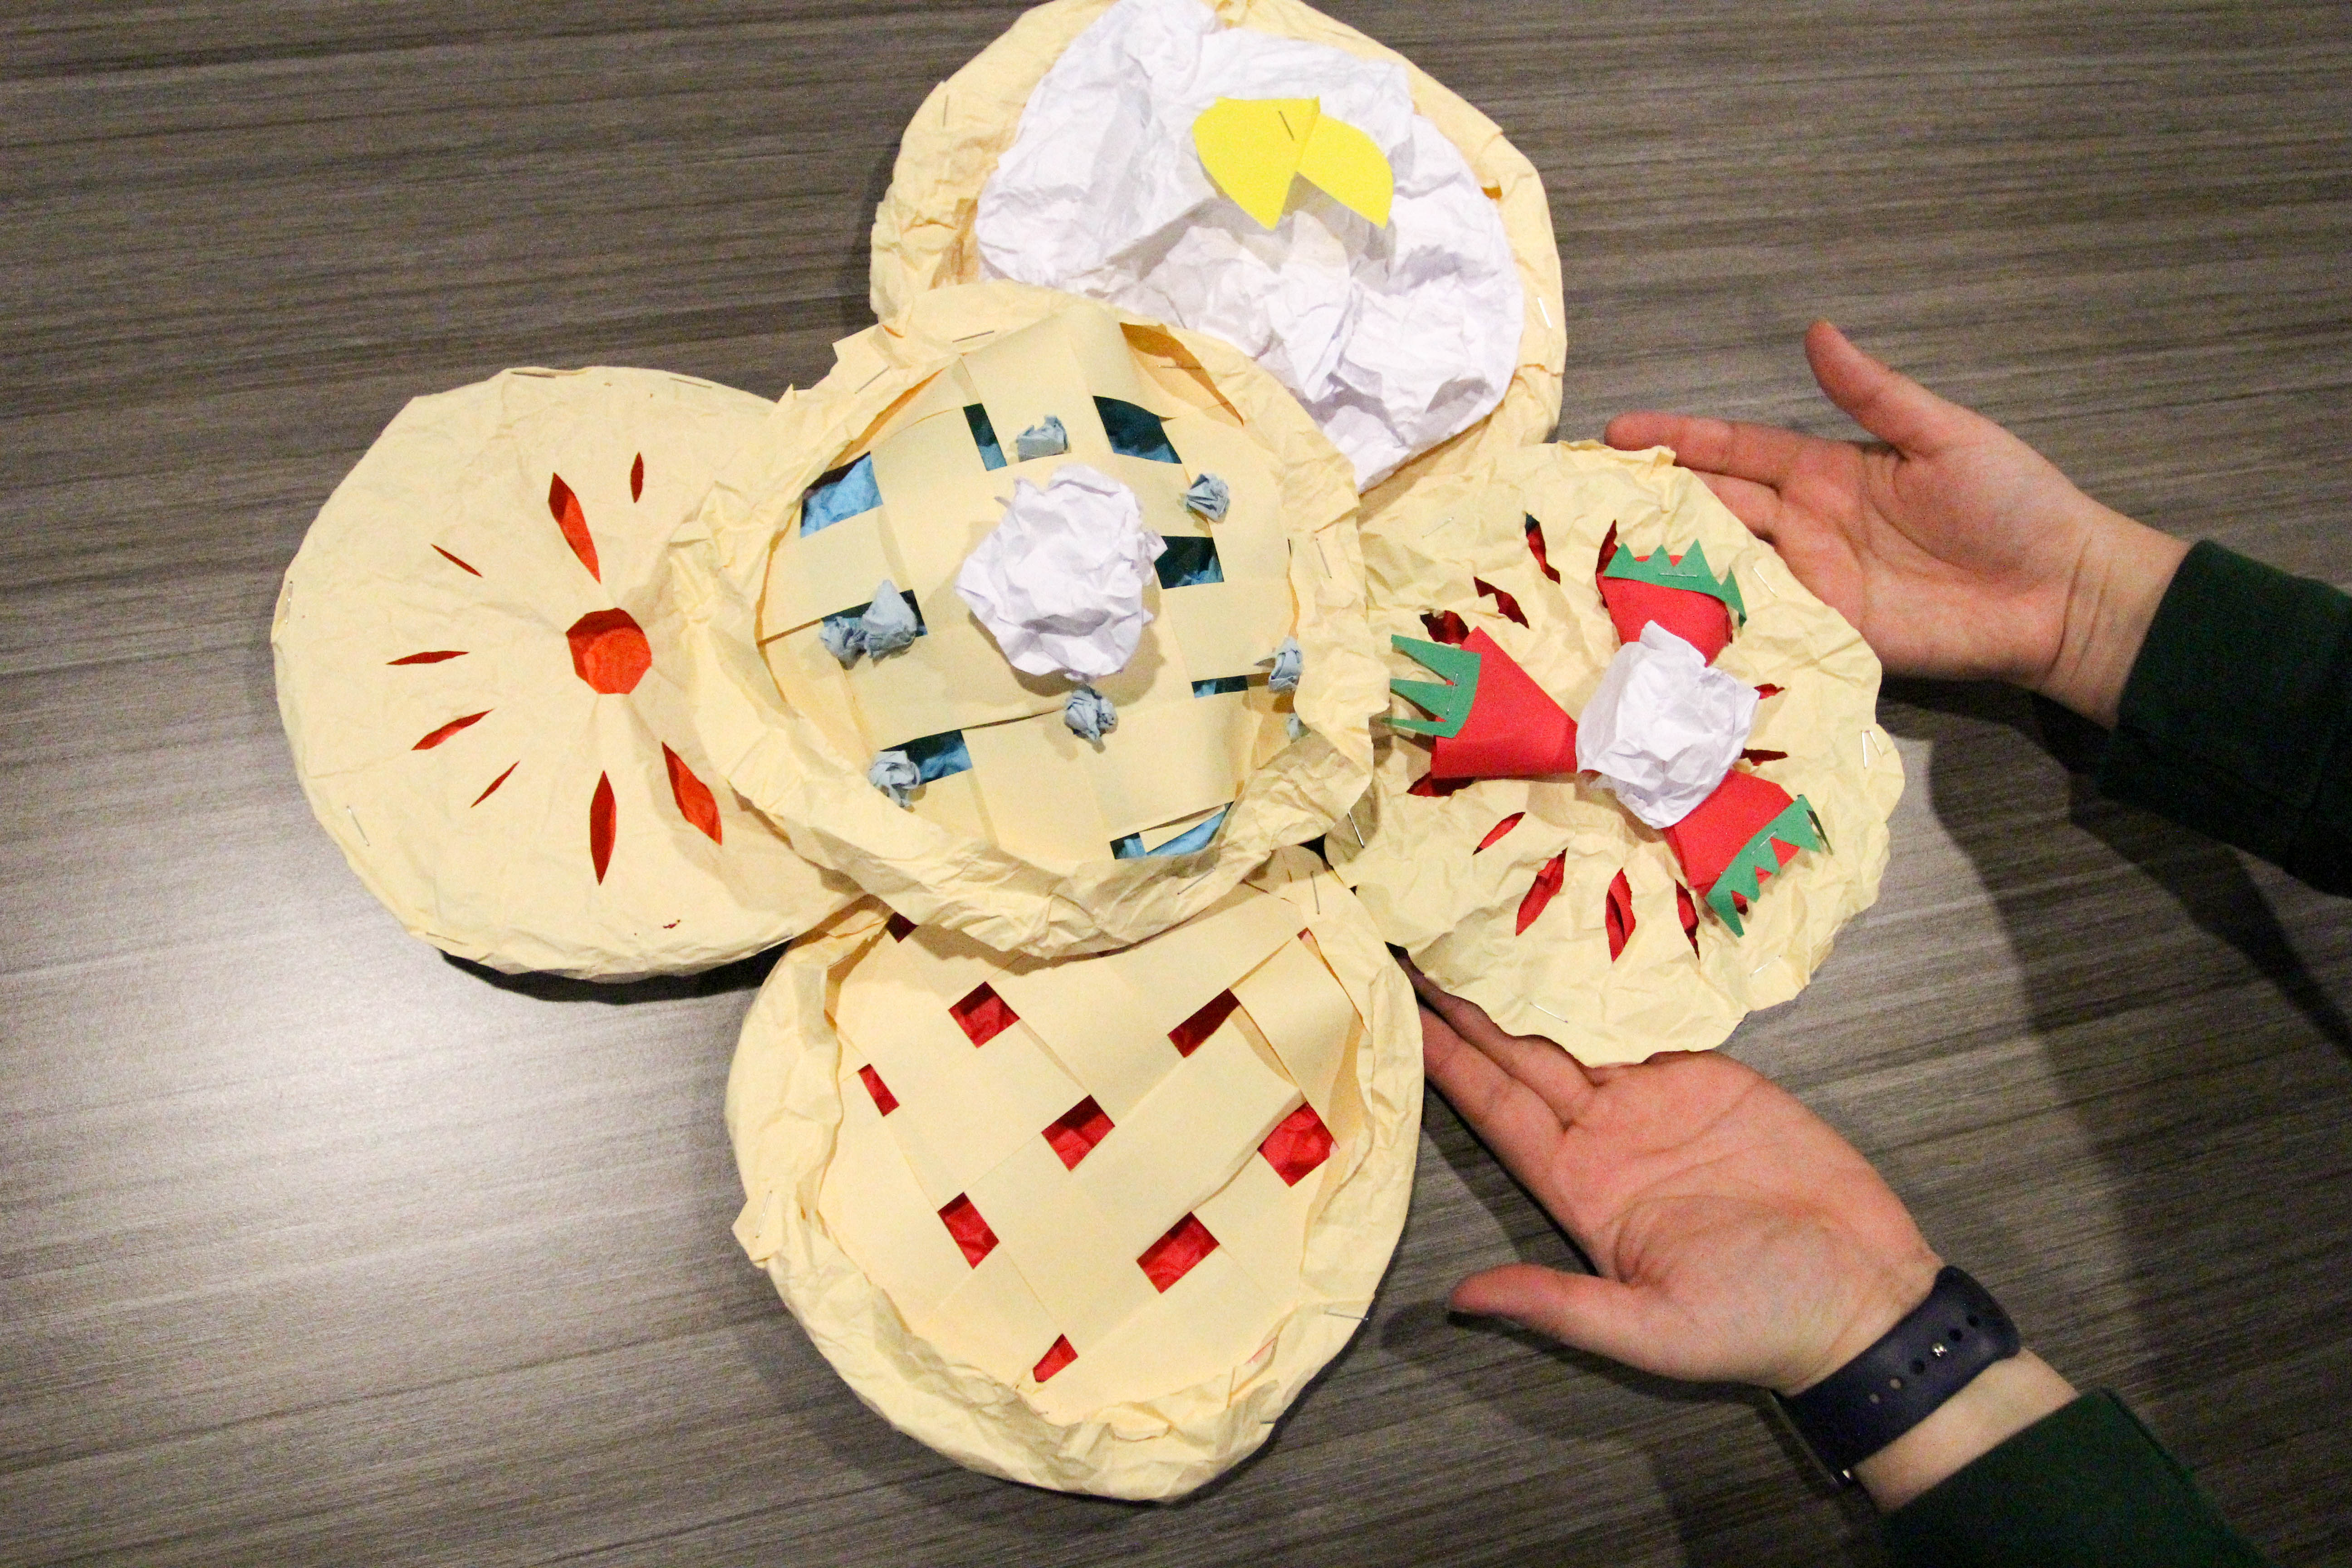
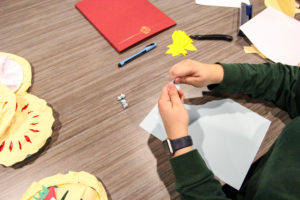
It’s time to decorate! We chose to create blue berries to garnish the top of our pie. These can be made by simply rolling up pieces of blue paper and place on top of the pie crust.
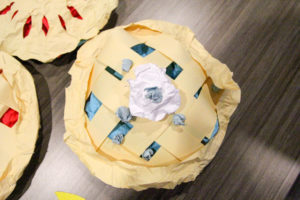 And what is pie without whipped cream? We made our whipped cream dollop out of white paper crumbled into a ball and placed onto the pie crust.
 Be creative! Top your pie with your favorite fruits!
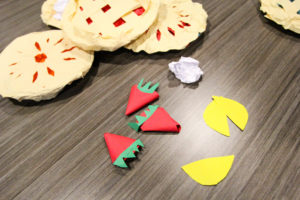
Pie toppings can be made easily out of colored paper.
Rebecca Ustrell, Community Outreach Coordinator
Becky acts as liaison for Children’s Foundation of America. On any given day she could be meeting with potential donors, coordinating a fundraising event, recruiting volunteers and forming partnerships with other nonprofits that can benefit from the help of our Foundation. Becky is currently studying sociology as well as fine art and helps organize the Claremont Art Walk. You will most likely find Becky working on freelance illustrations, playing the cello, mingling at a chamber of commerce event or volunteering in the community.
800-543-7730 | rustrell@trinityys.org